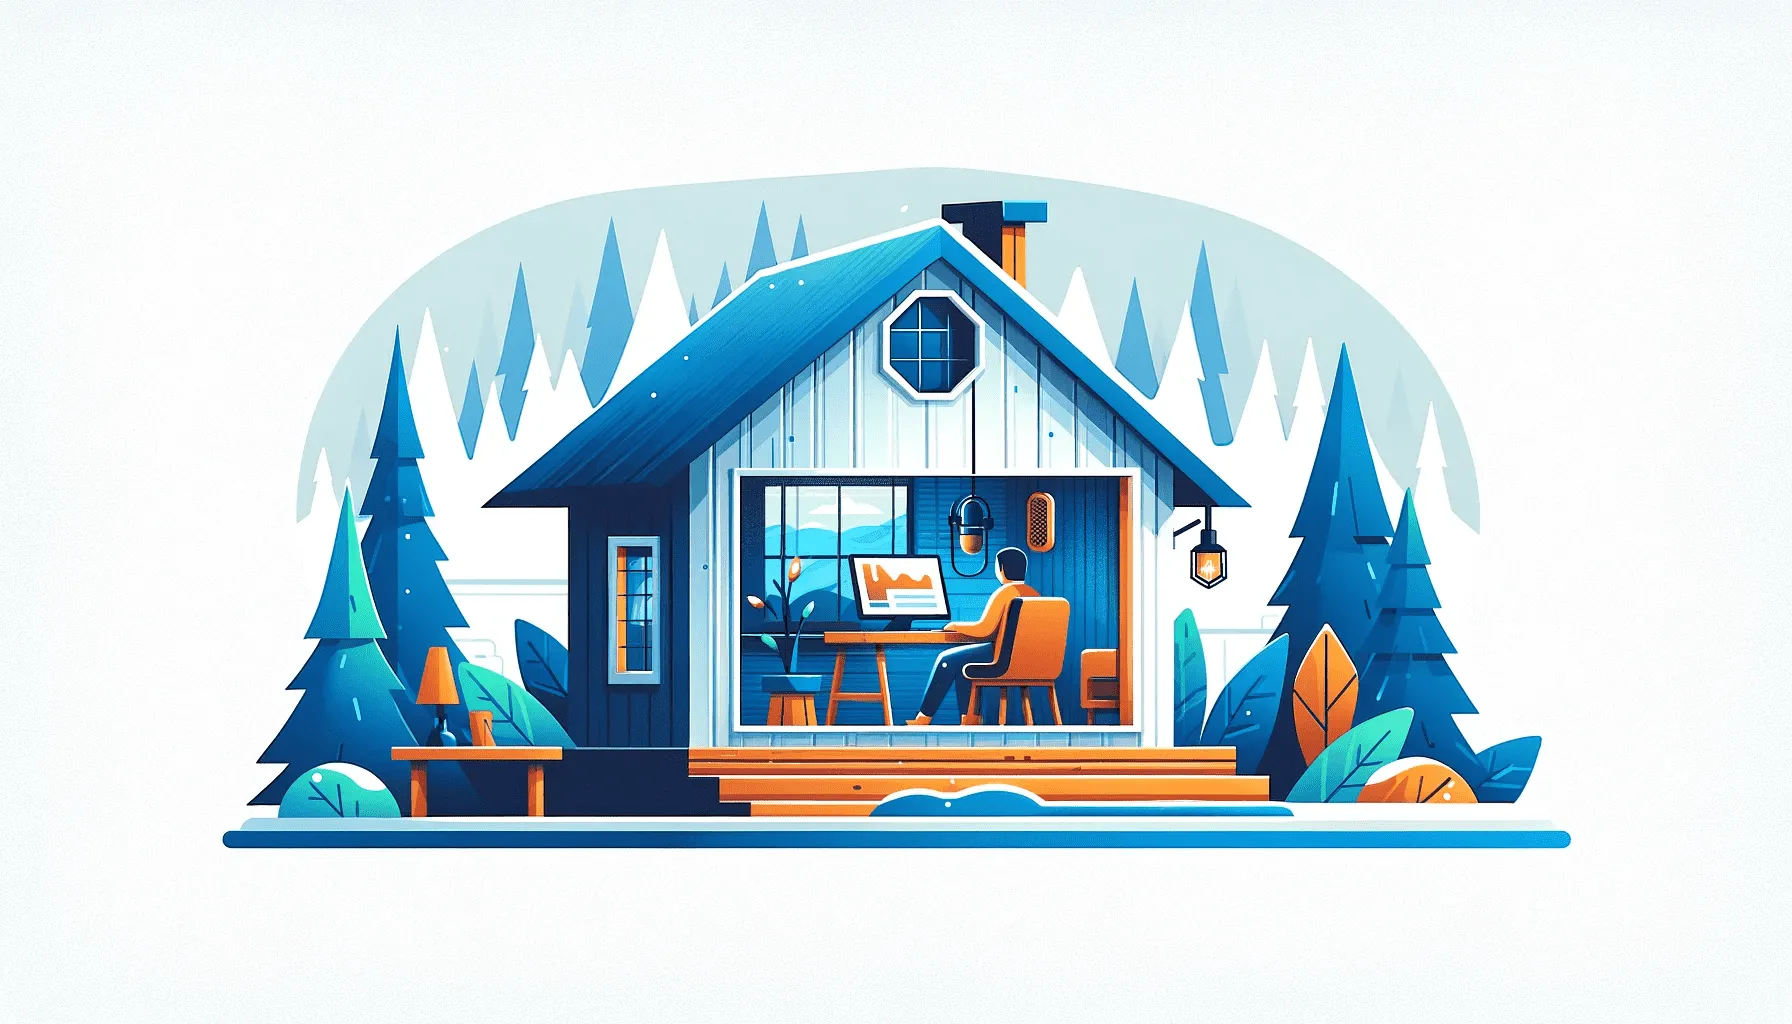
Broadcast Live Radio Shows on YouTube (How-To)
Have you ever wondered how to broadcast a live radio show or stream an event on YouTube. Learn all you need to start broadcasting live today.

YouTube Live gives you the ability to stream live on your channel.
You can broadcast interviews, events, concerts, studio sessions, webcam feeds, and more.
Today, we’ll cover:
- Streaming on YouTube (step-by-step tutorial using OBS).
- Different types of content radio stations upload on YouTube.
- What are copyright strikes?
- And more.
Let’s go:
Part 1. Basics of broadcasting on YouTube
Want your content on YouTube? There are three ways to go about it:
- Create a 24/7 radio stream.
- Broadcast a single show or live event.
- Upload pre-recorded shows.
24/7 radio streams on YouTube
So-called “Pirate Radio Stations” are prevalent on YouTube. In fact, the New York Times ran a story about them.
They featured College Music. The channel has grown from 794 subscribers in 2015 to the present number of 1.02 Million subscribers (January 2019).
Most 24/7 music channels aren’t radios exactly. You won’t find typical radio programming with interviews, jingles, top of the hour news, etc. There are just playlists.
These streams have looping videos of anime characters, fireplaces, steaming mugs of coffee, etc.
Examples:
- College Music (1.02M Subscribers)**:** https://www.youtube.com/channel/UCWzZ5TIGoZ6o-KtbGCyhnhg
- Cafe Music BGMC (1.98M Subscribers): https://www.youtube.com/watch?v=rcIEVCSrlEI
- Rap Town (15.3K subscribers): https://www.youtube.com/watch?v=ai8Iziv249w
“It’s difficult to find real stations with 24/7 streams on YouTube”
Most live audio streams on YouTube are not run by established radio stations. Plenty of TV stations, however, stream on YouTube, including NBC2, ABC7, DW News, Bloomberg Global News, ABC News Live, and more.
Live stream events
It’s typical to find stations that live stream their key events. For instance, iHeart Radio does live streams for album release parties.
See upcoming live streams on YouTube’s Live Section:
Upload pre-recorded shows
Got a special guest in the studio? Tape the interview and upload the footage to YouTube— without the music of course.
What if you have audio shows in your archive? Embed static images or short looping videos on the audio file.
Examples:
- Coast to Coast AM December Shows:
- Live interview footage. Mick Foley Talks 20 Years of “Have A Nice Day!”, KROQ radio.
- Filmed shows: Loaded Tux Top Shelf Freestyle Episode 2.
Behind the Scenes with South Carolina Public Radio’s Vincent Kolb-Lugo
Part 2. Going live on YouTube
In this chapter, let’s get into the specifics of live streaming.
There is one main question people ask.
Can you stream copyrighted music on YouTube?
Yes, but with permission from the copyright holder.
Without proper permission, you might receive a copyright strike.
How do copyright strikes work?
Content ID is YouTube’s digital fingerprinting system. It scans your content against any copyrighted material in the system. The copyright holder then receives an alert.
YouTube doesn’t file copyright strikes. The decision lies with the copyright holder.
They can make the video unavailable. View its metric like the number of views. Run ads and split the revenue with the channel’s owner.
So…
If you plan to play a Justin Bieber song, you require permission from Universal Music Publishing.
Licensing such music is quite costly.
Can I play non-copyrighted music?
Some content has not been uploaded to Content ID. Therefore…
Featuring it in your stream will not set alarm bells off.
Planning on using royalty-free music? Ensure it’s licensed for use on YouTube.
Step by Step Method for Broadcasting Live on YouTube
Step 1 - Verify your YouTube Account
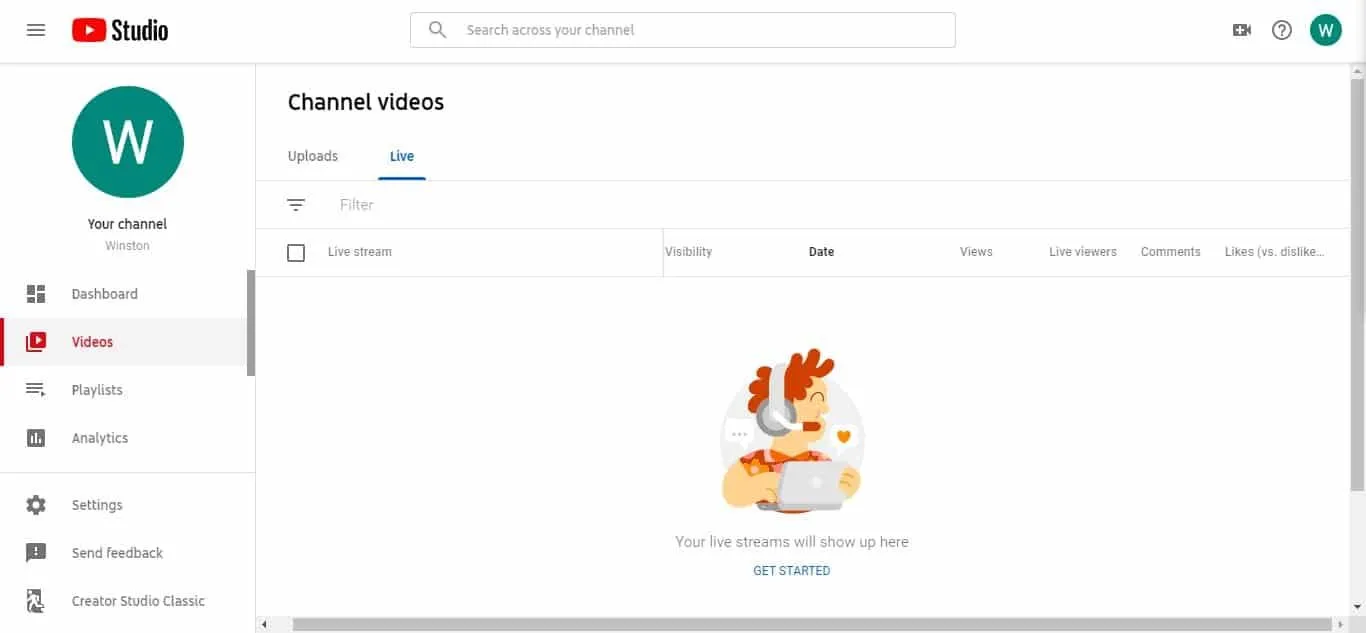
Verification takes 24 hours. You can’t go live promptly after reading this article. To get started: Click your profile icon → YouTube Studio.
Next, select “Get Started.”
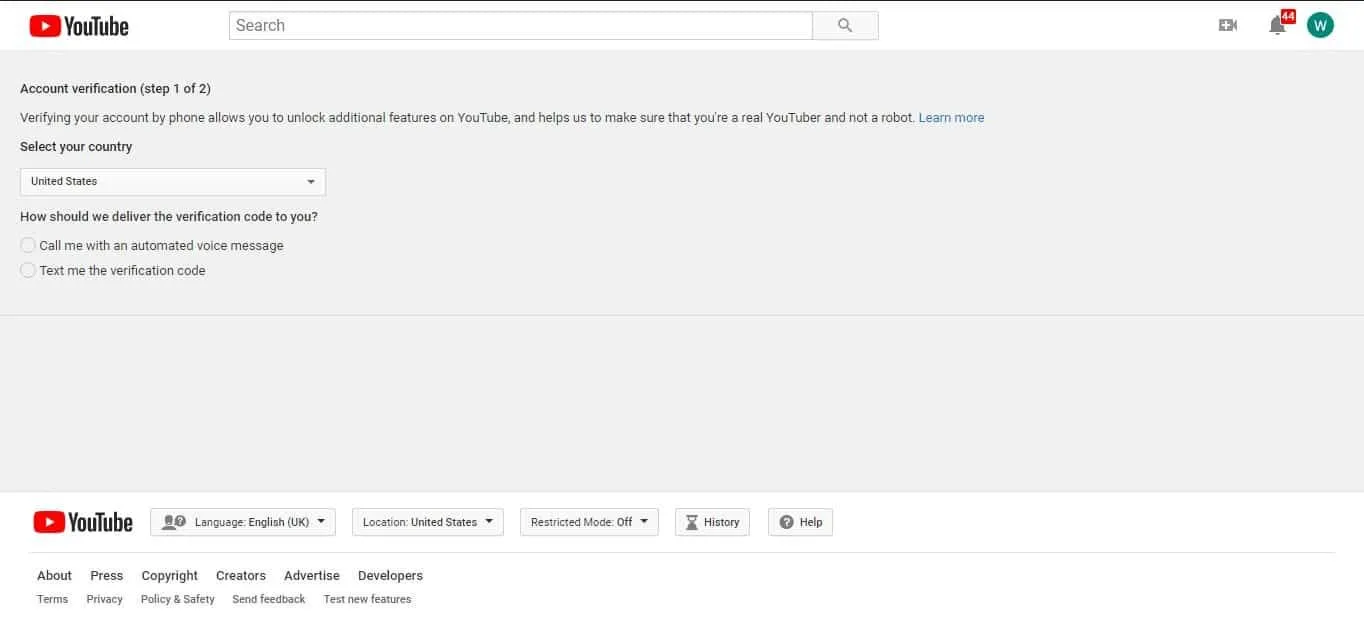
Select your country and enter your phone number. Choose whether to receive a text or phone call with the code.
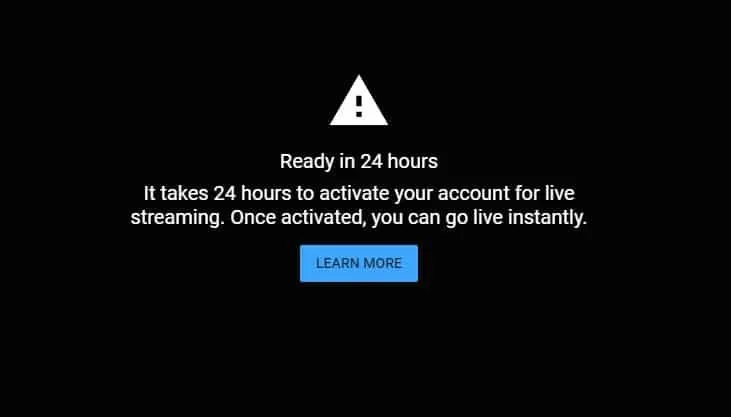
Verification takes 24 hours. After this, you can go live instantly. Now, you can’t go live using your mobile phone unless you have 1000 subscribers or more.
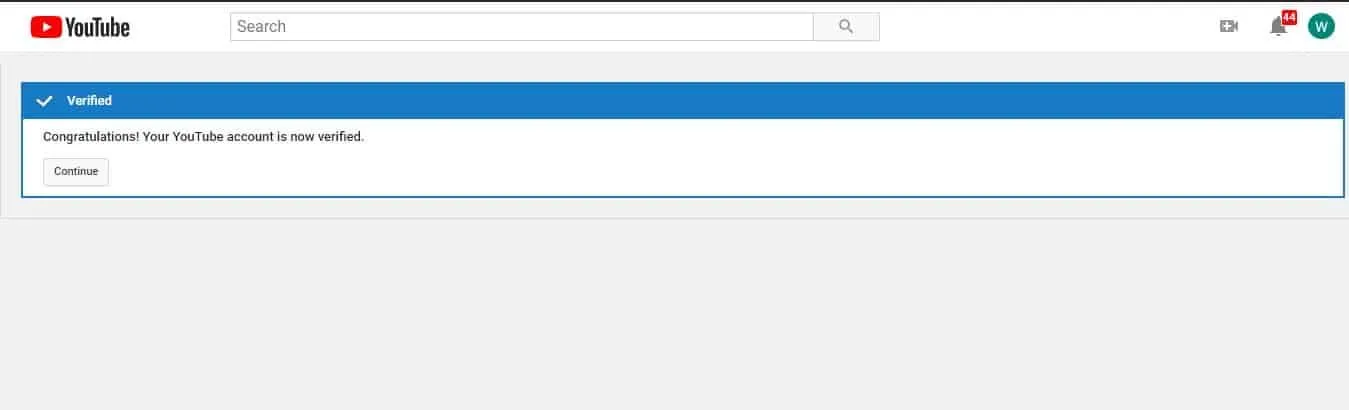
Once you receive this message, you’re set to begin the second step.
Step 2 - Download and install OBS

Step 3 - Configure OBS stream settings
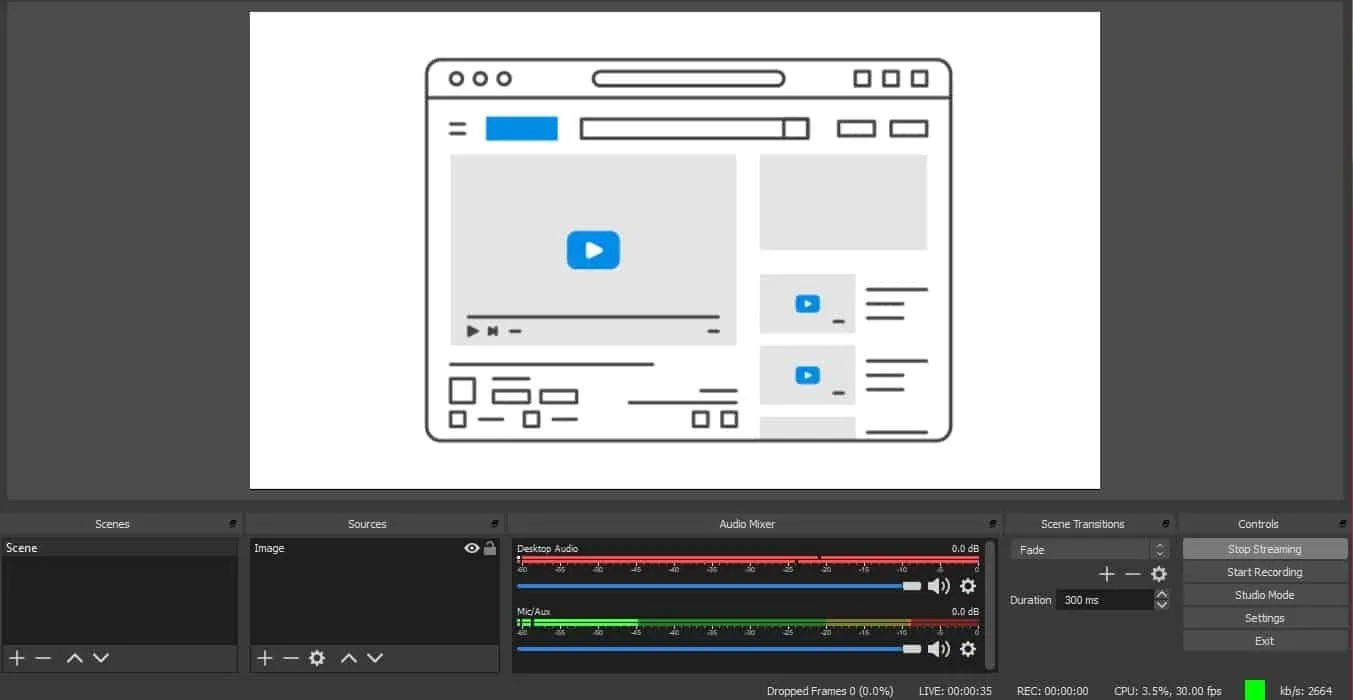
Here is the first look at OBS. Fortunately, it comes with an auto-configuration wizard that allows you to get started with ease.
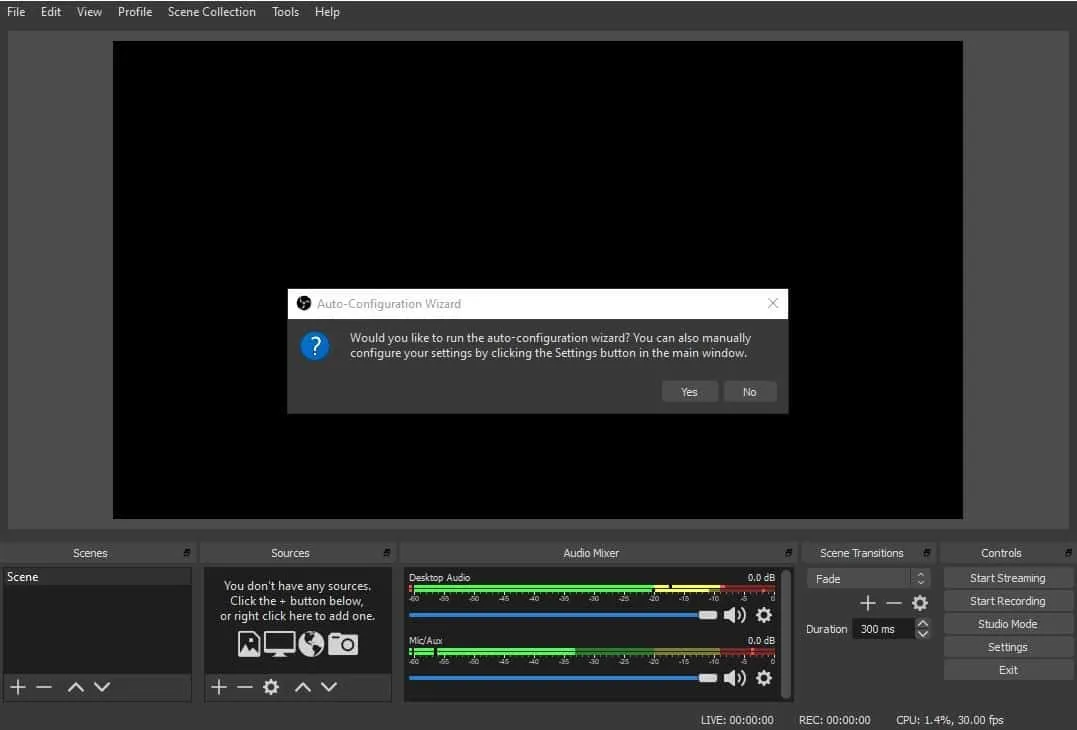
When prompted if you’d like to auto-configure, select “Yes.”
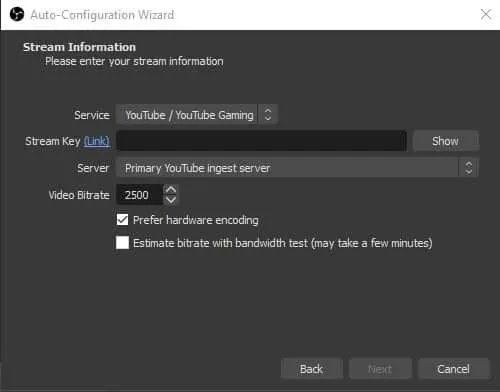
For the streaming information, select that you want to stream with “YouTube/YouTube Gaming.”
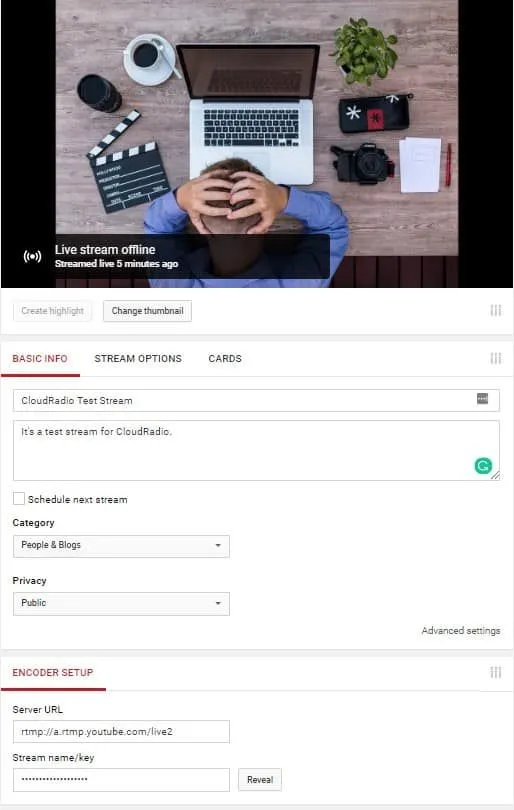
You’ll be prompted for your stream key. You can find it in your YouTube Live Dashboard as shown here:

Anyone with your stream key can broadcast live on your channel. So, keep it secret.
Copy the key and paste it in OBS, and complete the rest of the steps.
Step 4 - Configure your video source
OBS accepts a wide range of video inputs, including your webcam, external cameras, IP cameras, and other applications.
In this illustration, we simply displayed a static image and text overlay. Similarly, you can configure several audio sources.
Step 5 - Create a thumbnail and schedule your live broadcast
Before streaming, you’ll need a thumbnail. Details such as the stream’s category, name, privacy, are also required.
Step 6 - Start your stream
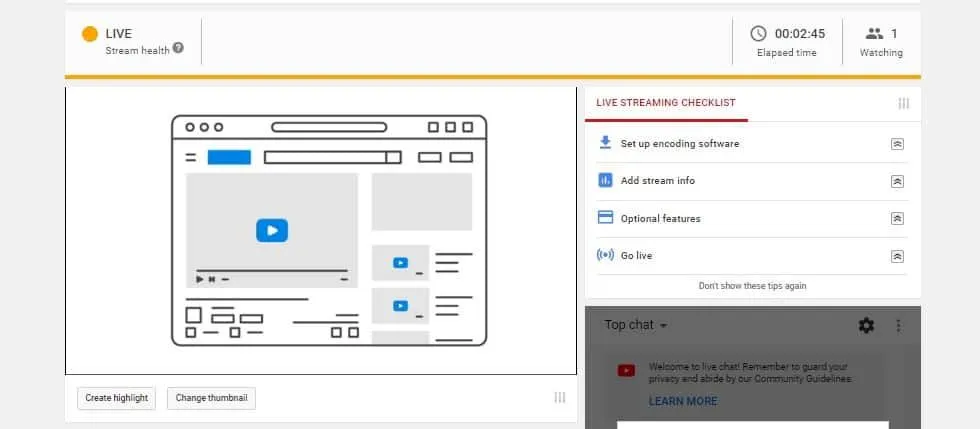
In the “controls” tab, select “Start Streaming.” Next, confirm that your stream is working.
You can view your stream health, enable live chat, and see how many people are watching.
Part 3. Best practices to make your stream the best
- Ensure you have the right equipment. Good camera, quality PC, etc.
- Use a connection with fast upload speeds (4 Mbps and more is sufficient for streaming).
- Have backup systems in place. And expect several things to go wrong. Your PC can crash. Mics may stop working. Power might go off. Your internet connection may become unstable.
- Create a quality stream.
- Promote your live event early and effectively. Give people incentives for tuning in like the chance to grab a prize.
- Prepare well in advance and practice.
Other encoders
OBS is open-source and popular with many YouTubers. Still, there are other software and hardware solutions at your disposal.
Software encoders include:
- Stage Ten (https://app.stageten.tv/login)
- Streamlabs (https://streamlabs.com/) Used by over 15 million streamers.
- XSplit Broadcaster (https://www.xsplit.com/broadcaster)
Hardware encoders include:
- Epiphan Webcaster X2. Goes for $300
- Elgato HD60 S – Can stream and record. Retails for $150 to $200
Other resources
- Set up your live streaming encoder
https://support.google.com/youtube/answer/2907883?hl=en
- Live encoder settings, bitrates, and resolutions
https://support.google.com/youtube/answer/2853702?hl=en&ref_topic=9257892
CloudRadio One gives you AutoDJ, 750 GB storage, and unlimited listeners for $39/mo.