Learn how to setup your broadcasting server with Rocket Broadcaster. All the instructions included and licensing information.
Software information
Platform: Windows
License: Commercial (free & pro for $49)
Server type: SHOUTcast, Icecast
Download Page: https://www.rocketbroadcaster.com/download
Overview
Rocket Broadcast is a robust and paid standalone encoder. If you're looking for an alternative to Sam Cast that is also affordable, it is a good choice.
The free edition comes with limited features. Your stream is limited to 128 Kbps. There is no support for unlimited streams but you're allowed only one stream. Other restrictions include an auto-reconnect delay and no auto-connect on launch.
One of the best highlights is that you can get a 30-day money-back guarantee.
Key features
- The PRO version can capture metadata automatically from your radio automation software or your favorite media player.
- It also supports VST plugins, Icecast SSL, and logging.
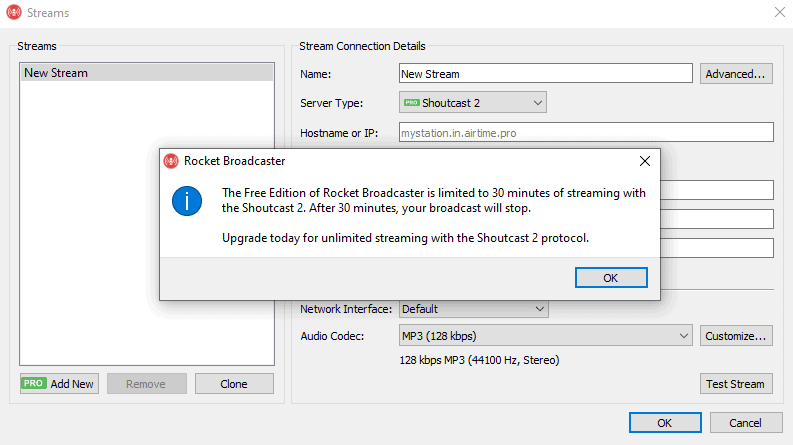
- The current version requires users to upgrade to the PRO version to stream to Shoutcast V2 servers.
- It currently goes for $49.
It may be possible to access a Shoutcast 1 server using Shoutcast 2 settings, but it will not support more than one SID.
Connect to your server
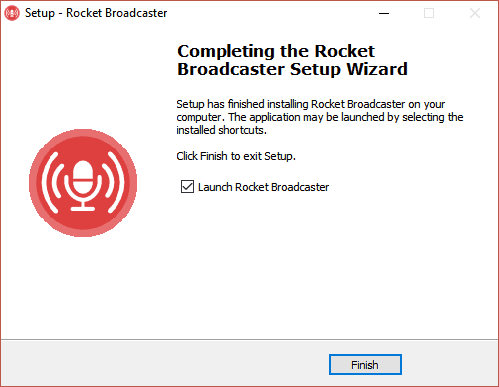
Install Rocket Broadcaster
- Download the installer.
- Open the .exe file to run the installer.
- After completing the installation, click Finish.
Configure the encoder
Next, you'll need to set up your encoder with your broadcasting server. For first-time installation, you may get the broadcast wizard.
You can also set up the Rocket Broadcaster directly from the main interface:
- Just select Start Broadcast.
- You'll receive an alert that you need to set up a new stream.
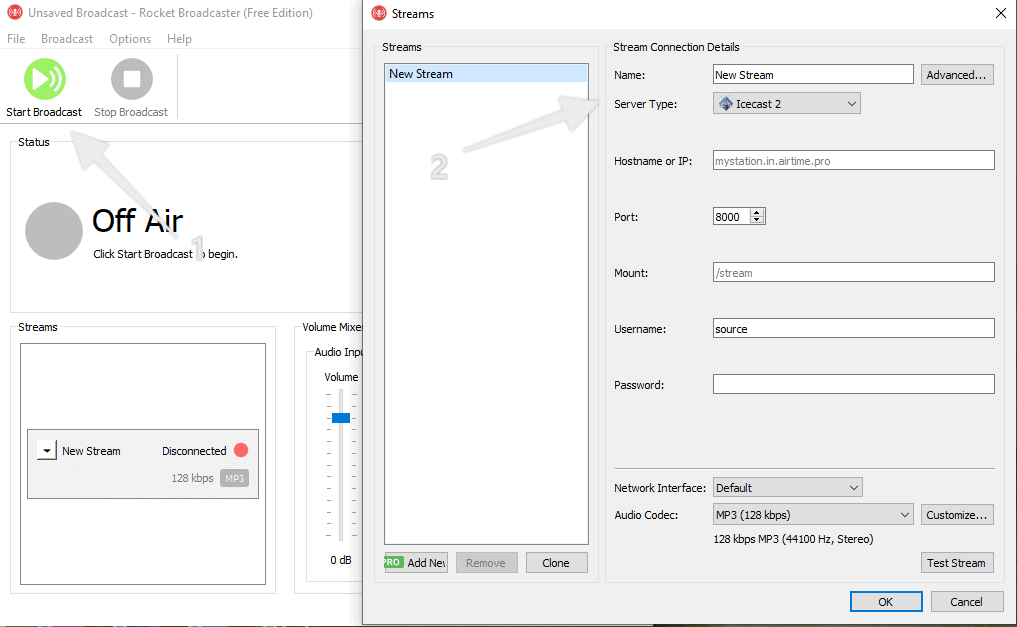
You'll need your connection details from Studio. See Broadcasting Live for where to find your server address, port, mount point, username, and password.
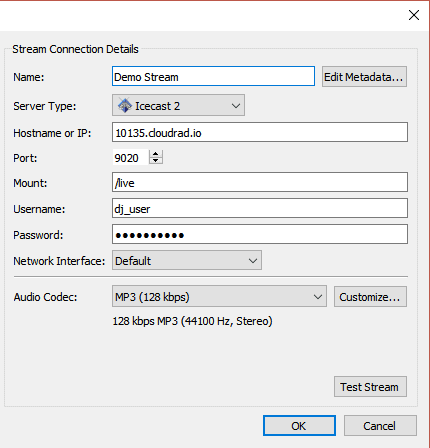
Enter server details
Enter the values from Studio into the corresponding fields in the encoder. Match the server type (Icecast or Shoutcast) to your radio's configuration.
- Rocket Broadcaster will restrict the broadcast duration if you're broadcasting to a Shoutcast 2 server on the free version.
Start broadcasting
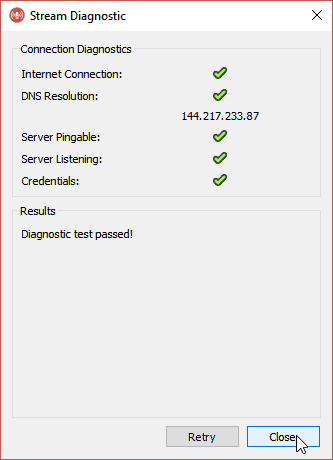
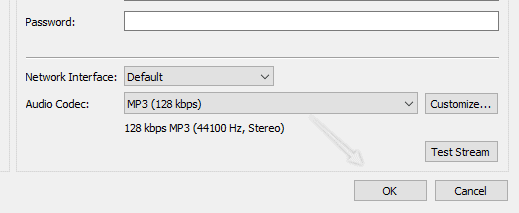
- Click Test Stream to find out if the encoder can successfully connect your broadcasting server.
- Finish by clicking Ok.
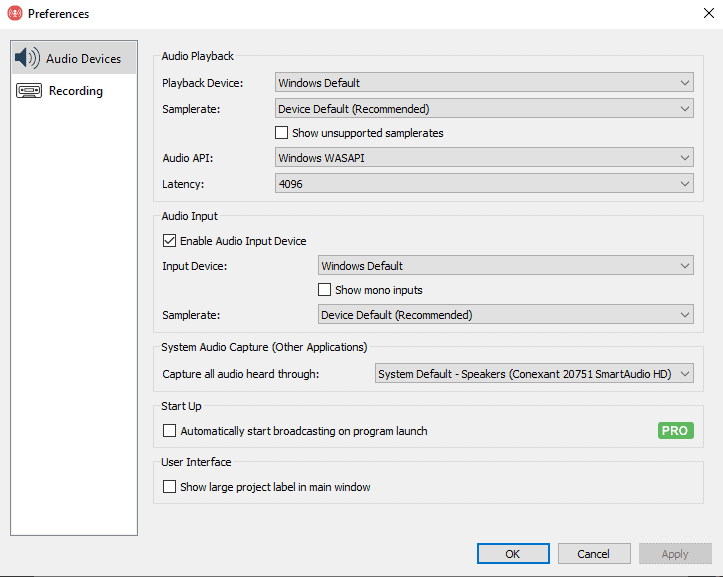
At this point, your encoder is still offline. Before broadcasting, make sure you have set up the audio playback and audio capture. You can do this by selecting Options > Preferences.
- Next, start broadcasting by clicking Start Broadcast.
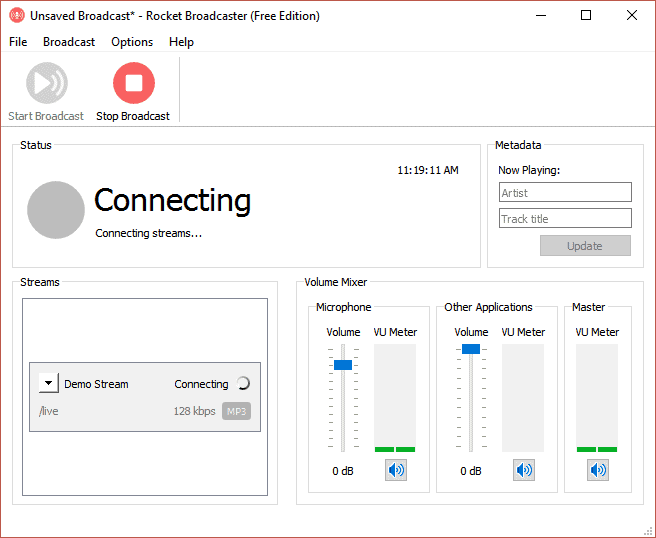
- Remember to save your settings by selecting File > Save Broadcast As.
You can learn more about Rocket Broadcaster here.
Need an alternative to Rocket Broadcaster? Explore over 20 radio automation, DJ, and encoder programs on our broadcast software guide.